Easy Gamification Tricks For PowerPoint
Learn easy gamification tricks for PowerPoint—Jeopardy boards, trigger animations, and branching quizzes—to turn static slides into interactive, engaging learning.

PowerPoint presentations are one of the most popular educational resources nowadays. Having been so for quite some time, they might look a bit old-fashioned and not as engaging as we would like. However, there’s a surefire way to make them much more dynamic – create interactive slides.
In this article, you’ll learn what interactive elements you can add to your PPT presentation, how to do this in PowerPoint step by step, and how to keep the audience’s attention by making the learning experience even more exciting and interactive with gamification elements.
Let’s get started.
Jeopardy Game
You can create numerous interactive activities in PowerPoint to gamify your eLearning experience. For example, a Jeopardy-style game can add an element of fun and competition to your learning process. Moreover, seeing those tiles with categories and various numbers evokes nostalgia for the times when you watched the show on TV. You always wondered with the contestants, “What’s the correct answer? Am I right or wrong?” It puts you in the participants’ shoes, even if you aren’t a guest on the show.
To create a Jeopardy game in PowerPoint, we’ll use the following features:

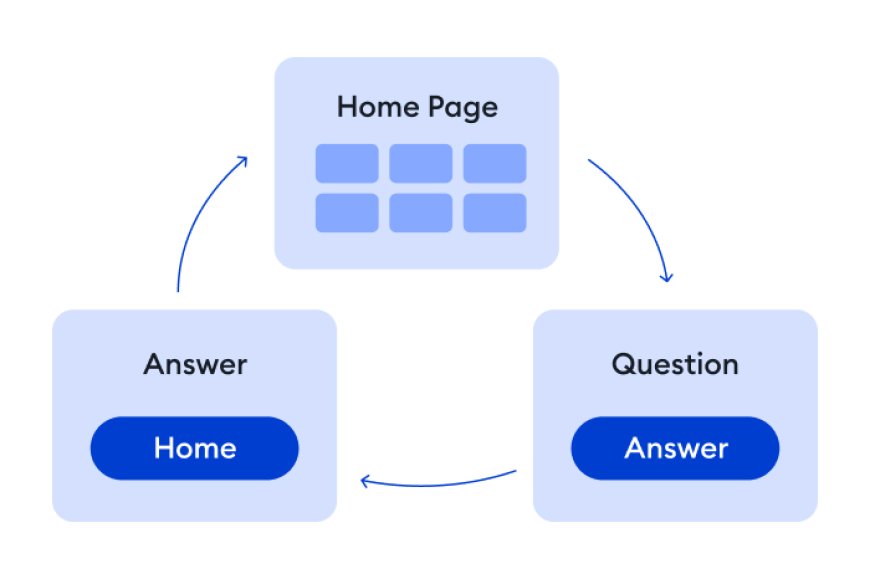
In the screenshot above is a reproduction of a Jeopardy board. Each cell contains ordinary hyperlinks. To create this game, all you need is a board slide, slides with questions, and slides with answers.
This diagram explains the principle of the game: three types of slides connected with hyperlinks.
more details, see this step-by-step guide on how to create a Jeopardy game. You can also download the pre-made template.
Free Jeopardy Game Template
Want to skip the hassle of developing the game from scratch? Simply download our free Jeopardy PowerPoint template and tailor it to your needs. Also, you can get a free trial of iSpring
Suite to convert your game into an online format and speed up your work considerably.
Trigger Animations

Let’s see an easy example and add some interactive buttons on a slide.
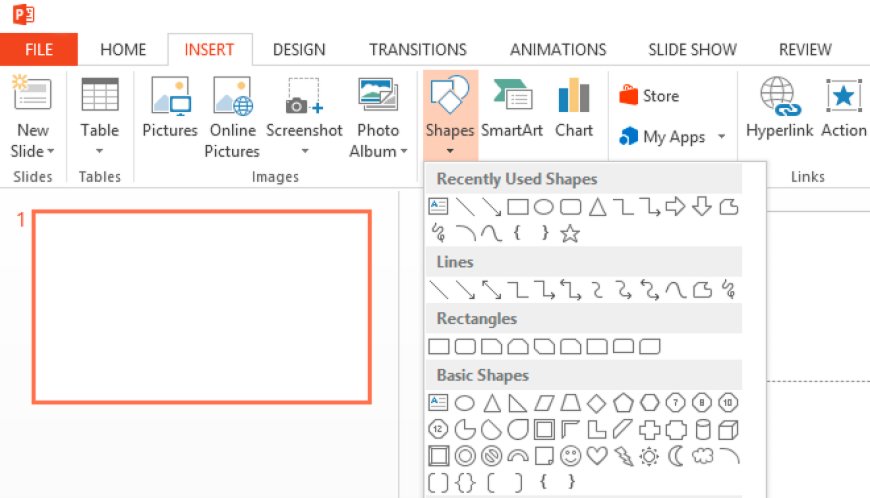
In your PowerPoint presentation, go to Insert -> Shapes and choose any shape you like.
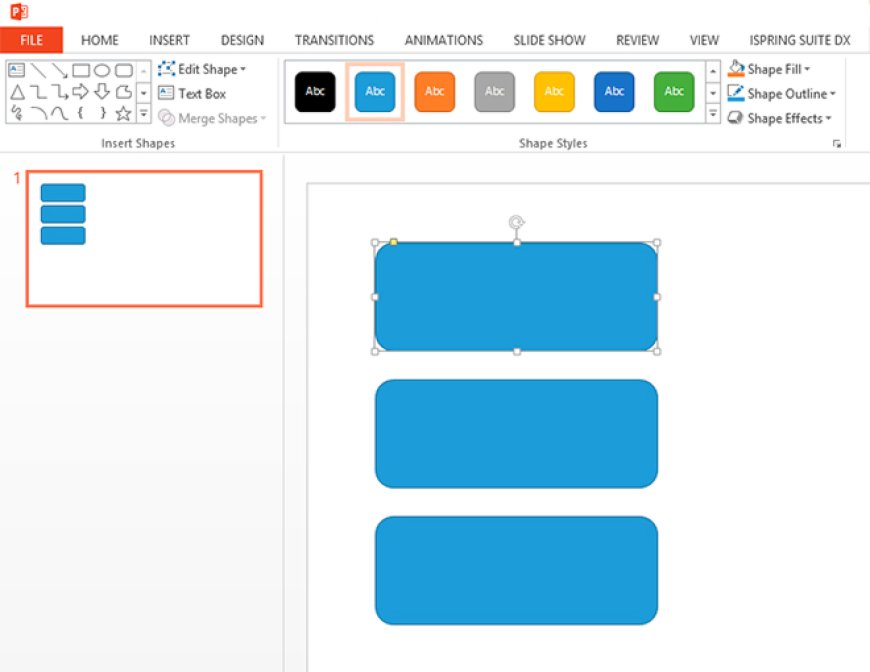
We will create three buttons. The easiest way to do this is via the magic of hotkeys: Ctrl+D.
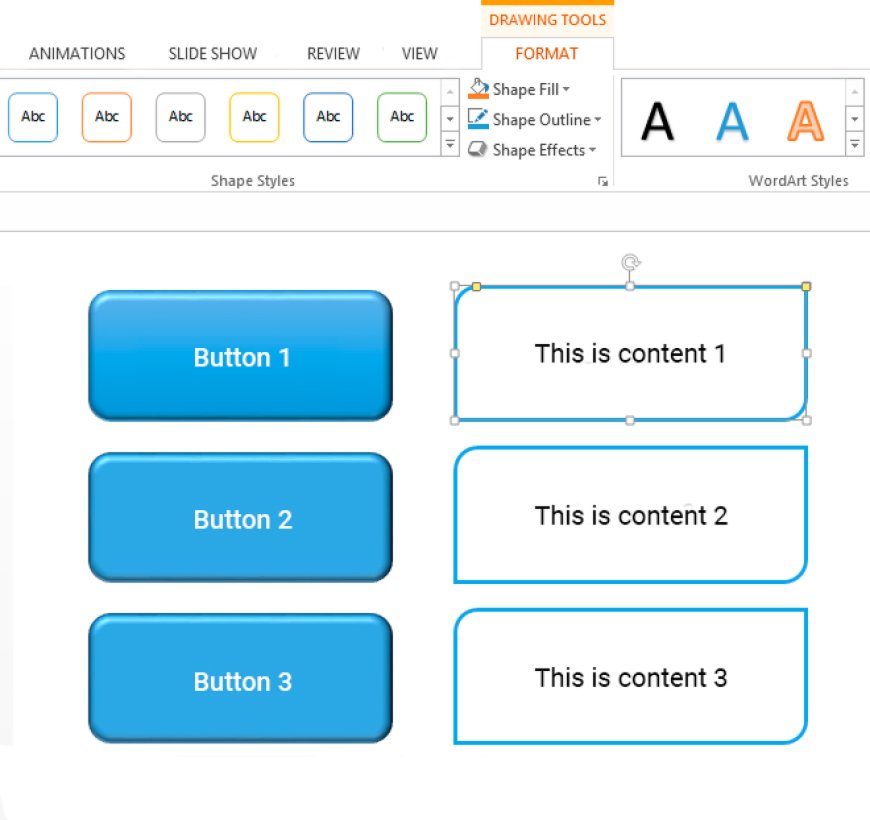
Now let’s make it so that when you click on a button, you see a text note. To do this, go to Insert -> Shapes and choose any shape you like (in this example, we chose a simple rectangle). Select the rectangle and apply the magic of Ctrl+D once again.
Then we need to add an animation so our rectangles appear on the slide. Go to the Animations tab, select the rectangles and apply any animation effect you like: for example, Grow & Turn.
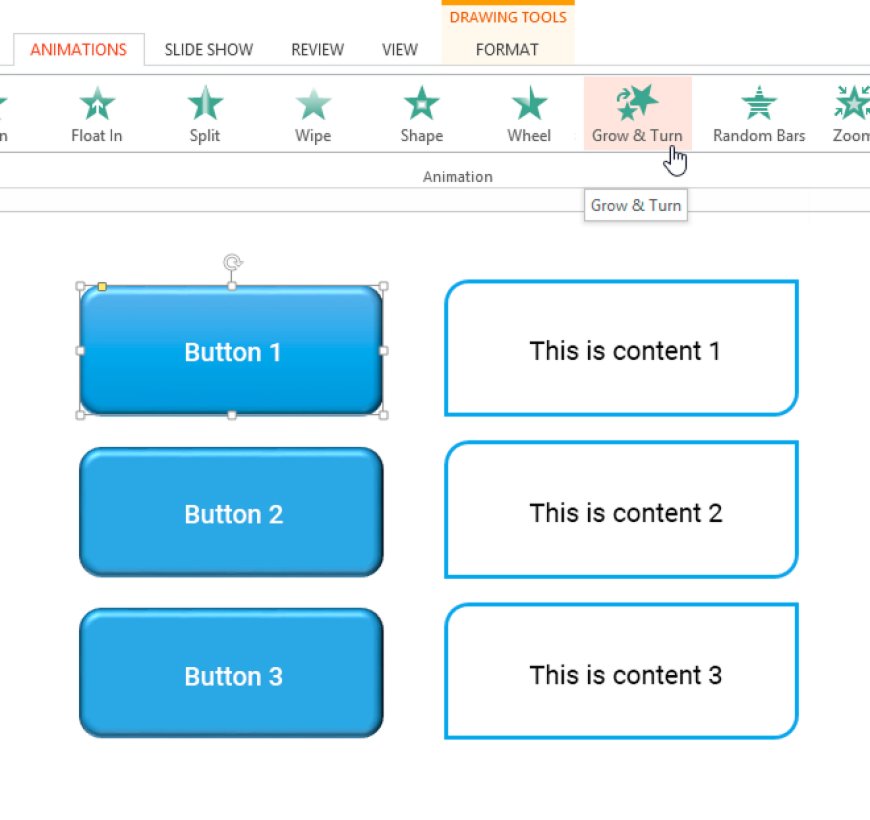
All animated objects will be listed in the Animation pane. You can set the moment of appearance for each object: start on click, start with previous, or start after previous. In this case, we need these rectangles to appear when we click the buttons on the slide.
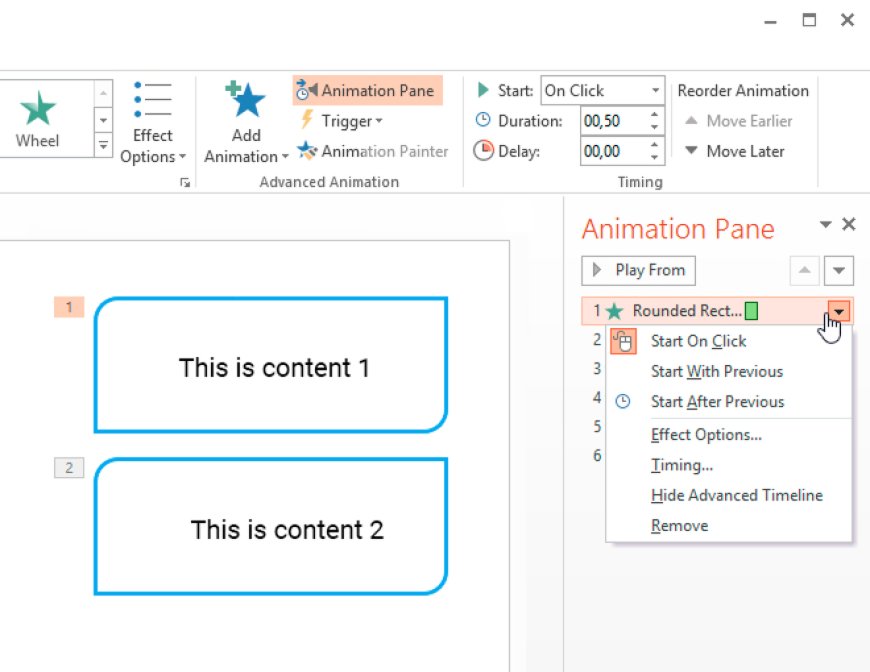
Here’s a trick: click Trigger on the Animation ribbon. From the drop-down menu, select the object you need to click on to see the rectangle.
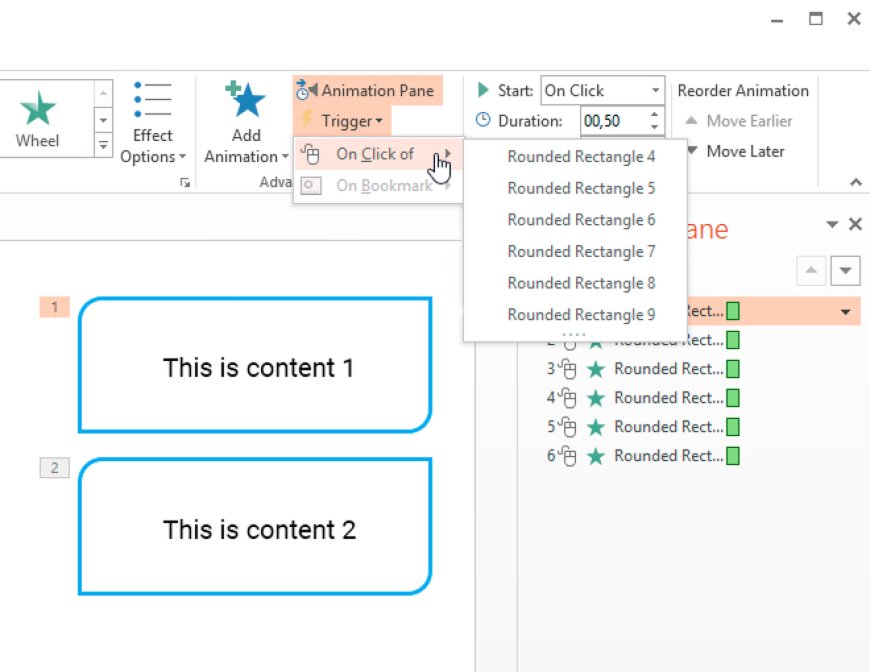
It might get kind of tricky here. The standard names of the objects on the slide may confuse you, so let’s give them identifiable names.
Go to Home -> Select -> Selection Pane. You will see the list of all objects on the slide in the right pane. When you click on the name of an object, it will be highlighted on the slide. Rename the objects to something you’ll recognize later.
Branching Scenarios Quiz
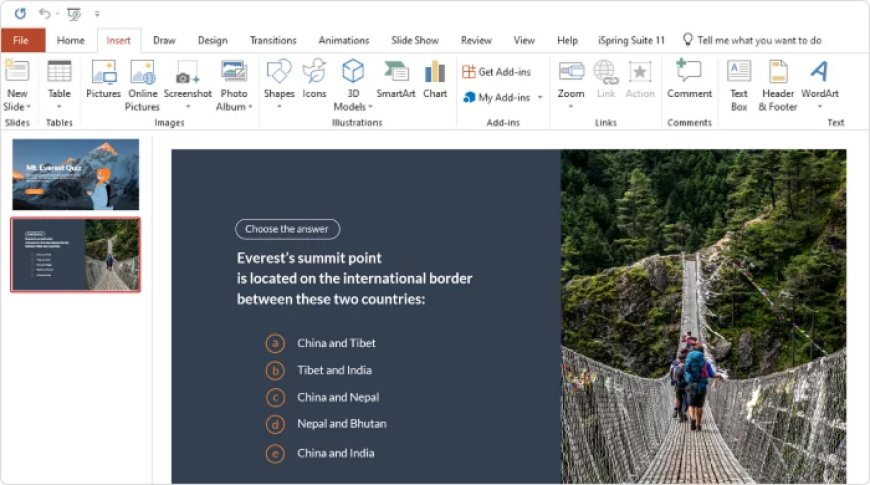
Another way to make your slides interactive is to add a quiz with clickable answer options. You can also make the test progress differently for each student, depending on the option they select: if the answer is correct, they proceed to the next question; if not, they go to the info slide to dive deeper into the topic. Or you can make it so that a learner receives feedback after each answered question.
Below, you’ll learn the basics of building quizzes and branching scenarios in PowerPoint, which you can further use for creating all sorts of tests – the essentials are the same.
1. Create the title page of the quiz. Add a background image, then type the title of your quiz and its description.
2. Move on to the next slide to add a question and answer options. For the answer options, you can simply use text blocks (Insert → Text Box) or shapes (Insert → Shapes). You can also add an image if you wish.
Add other question and answer slides for your test in the same way.
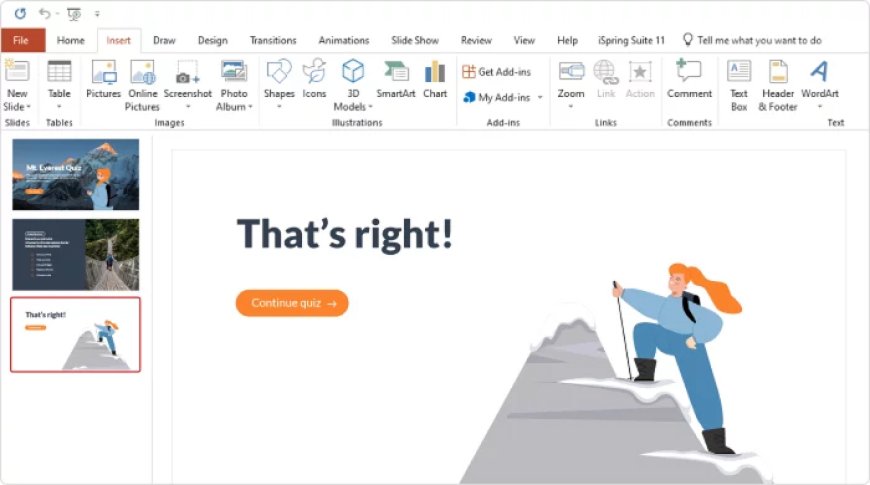
3. Create the correct answer slide after your first question. Add a congratulatory message, such as: “Well done!” or “That’s correct!” or “Correct!” Below the message, add a button that will take the learner to the next question.
4. Create the incorrect answer slide. Repeat the same process as in the previous step but add a different text (and an image, if you use them).
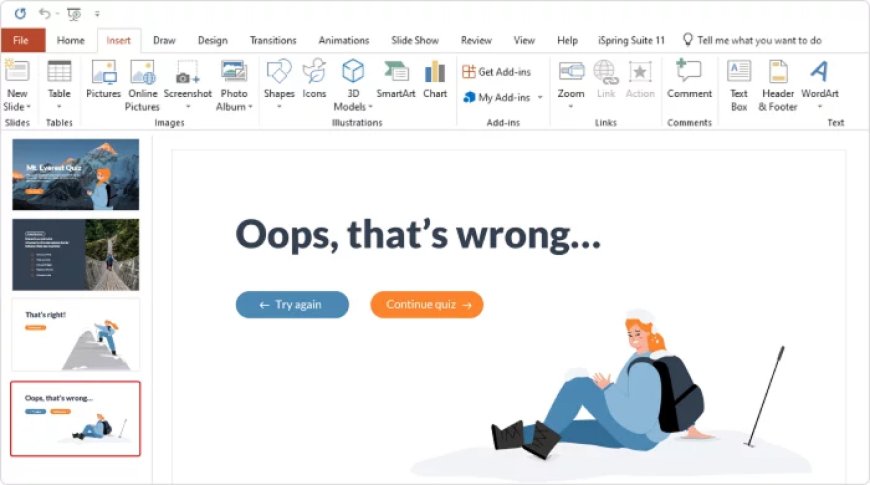
If you want to make knowledge checks even more insightful for learners, you can provide them with feedback on each incorrect answer.
Add correct and incorrect answer slides after each question slide.
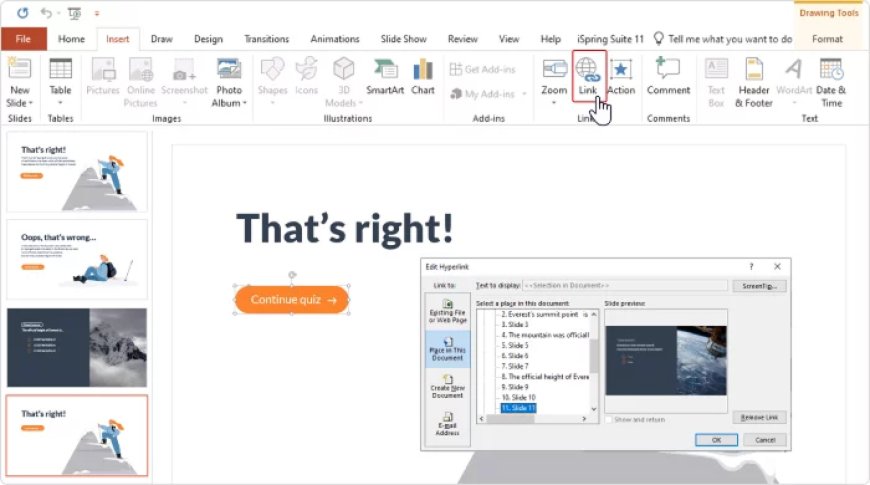
5. Set navigation for your quiz. Link the correct and incorrect answer options to the relevant feedback slides. Click on the answer text box, then go to the Insert tab and select Hyperlink. In the opened window, select Place in This Document and select the necessary slide.
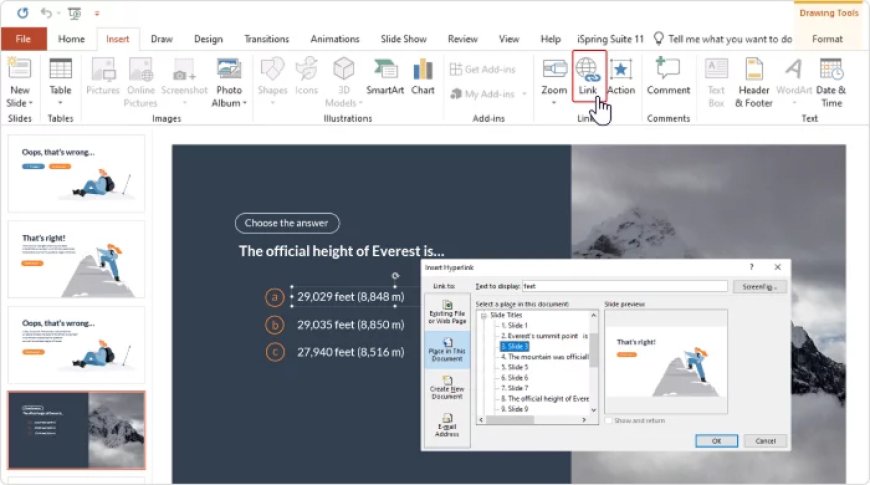
Then add a hyperlink to the button on the feedback slides. You’ll need to do the same for each slide because feedback slides should lead to a new question every time.
Once you’ve finished setting up navigation, your quiz is ready. If you want to learn more about this topic, read our article on how to make a quiz in PowerPoint.
Endnote
So, these are several ways you can create engaging presentations with PowerPoint only and with other tools (check out this list of the 12 best interactive presentation software tools).
If you want to save time and effort while creating much more engaging and interactive presentations, courses, and assessments, check out iSpring Suite.
AI in the Classroom: A Practical Guide for Educators
Artificial intelligence isn’t just a futuristic idea anymore. It’s here, reshaping classrooms, lesson plans, and the very role of educators worldwide. Tools can now adjust to each student’s pace, help with grading, and even answer questions. But how can teachers use AI wisely and keep it helpful, not harmful?
This guide helps educators use AI effectively in the classroom. It covers creating better assignments, detecting AI-written work, and using authoring tools for online course creation with AI. Whether you're new to AI or want to refine your approach, it provides practical ways to integrate technology into teaching without losing the human touch.
https://www.ispringsolutions.com/guides/ai-in-the-classroom